Saturday, March 29, 2014

How to Make Saffron water | केशर पाणि

I had seen this trick in one of 'Vahchef's' videos when chef 'Sanjay' needed saffron water for some reason and he casually shared this tip of making the perfect Saffron Liquid.I exactly do not remember the recipe I see more and more and more recipes of him,but all I remembered of this important and easy TIP.

Needless to say that saffron is used world wide.In Indian dishes,two things come to mind immediately,those are 'Shrikhand' and 'Biriyani' where this saffron liquid is a must.Now,let us learn to make this.


Ingredients :

  1. Kesar or Saffron - 8 to 10 Strands.

STEPS :
  • Heat a heavy bottom utensil or you can also use a laddle.
  • When it is hot, put the flame off and immediate place the Saffron strands on the hot surface.
  • Within some seconds,you will get to feel the nice aroma of saffron.
  • Now Saffron strands are hard and can be crushed very easily.Transfer the Saffron to a bowl.
  • Crush with hands or spoon.
  • Add around 4 Tsp of water and leave for 10 minutes.
  • After some time,you will see a nice orange water. 


TIP :
  • Milk can be used instead of water.

Tuesday, March 25, 2014

नाचणी चे आंबिल | ರಾಗಿ ಅಂಬಲಿ | Red Millet Savory Porridge

'Nachani cha Ambil(Marathi)' is a fanous and 'must have' beverage in all Maharashtrian and Karnataka homes.But let me tell you, not only in India, but this beverage is consumed in many parts of the world with different names.'Raagi Ambali or Abmli' is the Kannada name..It's a savory porridge.

This is the most popular summer cool drink in both villege and cities.If you go the villages in Karnataka (North) and Maharashtra, you will definitely get to see this and of course you cannot deny their hospitality. Because Red Millet is rich energy source, one cannot say no to it.

Ragi keeps the body cool.

Let us learn how to make.There must be many versions of making this.It is one of them.

The following measurements makes around 6 glasses depending upon the consistency one likes.

Ingredients :
  1. Ragi or Red Millet flour - 1/2 Cup
  2. Green chilli - 1 (Depending upon how much spicy you want, you can adjust the quantity)
  3. Garlic - 2 cloves
  4. Salt to Taste
  5. Butter milk - As Required (For 6 people, around 1 liter must be sufficient).

STEPS :

  • In a container,add 750 ml water and keep to boil.
  • Add salt
  • Cut the Chilly and garlic and mash it and add immediately to the water.
  • Now, make a paste of Ragi flour.This paste need not be thick one,Make sure,there are no lumps in the paste.
  • By this time,water must be boiling.Bring the flame to low.
  • Now start adding the Ragi flour Paste with one hand and keep stirring the water continuously with the other hand.
  • Do not stop stirring until the porridge is cooked.It takes around 5 -7 minutes to be cooked.This helps avoid lumps in the porridge.
  • When it is really cooked,it turns out to be dark brown.
  • Keep For cooling.
  • In a glass, add this Ragi ambli and buttermilk.Mix well and is ready to serve.
TIPS : 
  • You can add some extra salt to Ambli.So when you add the buttermilk, the taste gets balanced
  • Make sure that the flour is cooked well.Uncooked porridge results into bitter taste.
  • You can refrigerate this  Ambil or Ambli and add fresh butter milk whenver needed to serve.
  • This is supposed to be drunk cold.
  • You can add chopped MINT leaves to buttermilk.It tastes really good.
  • You can skip adding chilies and garlic,Makes better option for kids

Wednesday, March 19, 2014

लसणाचि चटणि | Garlic Chutney | ಬೆಳ್ಳುಳ್ಳಿ ಚಟ್ನಿ | Garlic Chutney

This is the chutney found in Maharashtra and most of Karnataka.Main ingredients is garlic along with dry coconut.Tales less than 5 minutes to make.There are many versions where sesame seeds and peanuts are added too.but this version just awesome and goes perfect with chapati, roti, rice etc


Ingredients :

  1. Dry grated cocnut or Coconut flakes - 1 Cup
  2. Garlic cloves - 1/4 Cup
  3. Kashmiri Red Chilli Powder - 3 Tbsp
  4. Cumin seeds - 1 Tbsp
  5. Salt to taste
  6. Sugar - 1 Tbsp (Optional)

Steps :
  • Add all the ingredients to the grinder and grind it as much as you can.
  • Stop the grinder after every 30 seconds,give a mix and grind again.It stars loosing oil and then your chutney is ready. 
TIPS :

  • Depending upon the Coconut, the chutney may remain dry.In that case, add 2 Tbsp of edible oil and grind again.
  • Keep in ait tight container.
  • Try this : Add butter to chutney.Apply this mixture to the bread and grill it.The out put you get is just heavenly.Same applies to Chapati or Roti.

Saturday, March 15, 2014

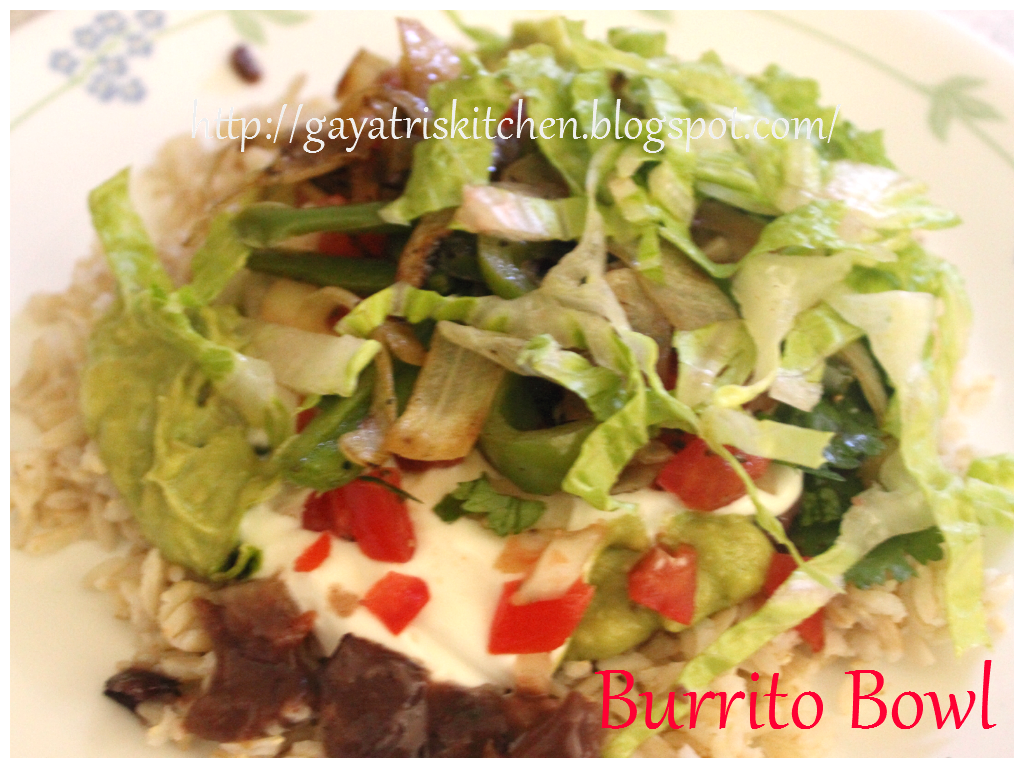
BURRITO BOWL

The easiest recipe on this earth I would say.This Mexican bowl has a special place in my heart.Let us learn the recipe.
The below measurement serves 1 person
Ingredients :
  1.  Cooked Rice - 1 Cup (You can choose to have white or brown rice)
  2. Guacamole - 1 Cup (You can adjust the quantity according to your taste)
  3. Lettuce,shredded - 1 Cups       
  4. 1/2 Onion -  Finely chopped
  5. 1/2 Bell Pepper or Capsicum - Finely chopped
  6. Salsa - chopped onions,chopped Tomatoes- 1/2 cup each,cilantro - 1/4 cup,coarse pepper (1/2 teas spoon),salt to taste,Lime Juice (1 Tbsp)
  7. Baked Beans - 1/2 cup ( In a pan, add baked beans, little water, salt to taste and boil for around 5 mins,along with mashing it).
  8. Boiled corns (Optional)
  9. Cheese (Mozzarella or Parmesan) - 1/2 Cup (Optional)
  10. Sour Cream - 1/2 Cup (If you do not have, take yogurt in a container, whip it nicely and it is a great substitute)
STEPS :

  • In a pan, take 1 tsp of Oil or Butter.To that add Bell peppers and Onions,Salt and sauté until they are nicely fried and cooked. Set it aside.
  • In a Bowl a plate, spread the rice.
  • Next layer is Guacamole
  • Baked Beans
  • Then comes Sour Cream
  • Now fried Bell peppers and Onions
  • Next one is Salsa,Lettuce,Corn
  • Cheese

TIPS : I do not think there is any thing as this is the effortless but yet delicious recipe.I have not added the Chipotlé sauce.You can add if you like.

Monday, February 24, 2014

Tadka/Phodanicha Bhaat/Vaggarane Anna - Using BROWN RICE

Brown Rice is good for health but at the same time it does not taste as good as white rice.So most of the times, we eat this as a punishment just because we do not have option (Including me).

This is what made me come up with this recipe.Believe me,you will begin to love the brown rice with this recipe.It tastes better than the white rice when prepared.

Ingredients :
  1. Cooked Brown Rice  - 2 Cups
  2. Oil - 2 Tb Spoons
  3. For Tadka/Fodani/Vaggarane - Mustard seeds and Cumin Seeds (1 Tea Spoon each), asafoetida and Turmeric Powder (1/2 Tea spoon each)
  4. Garlic, chopped - 1 Tb Spoon
  5. Onion - 1 in count,chopped
  6. Chopped vegetables that you like
  7. Green chillies - 1,chopped (I have used Jalapenos for a change.Give a try)
  8. Peanuts - 1/4 Cup (Optional)
  9. Salt to Taste

STEPS :
  • In a pan, heat the oil.To that, add Mustard and Cumin seeds.After they splutter, add Asafoetida and Turmeric Powder.
  • Now add, all the veggies,Garlic and Peanuts and saute them until they are well fried and cooked.When fried,you should get nice aroma.
  • Add salt and mix it well.
  • Now to this,add the cooked brown Rice  and mix it well with the Tadka or Fodani .Do it for 5 to 10 minutes.
  • Garnish with Coriander and other vegetable.
  • Brown rice is ready to serve.
TIPS : If you wish, you can add little Garam masala and Lime juice in this.


Saturday, February 8, 2014

MATAR PANEER/मटर पनीर/Peas and Cottage Cheese in Tomato Gravy

Yeah!!! The most liked Punjabi dish it is.Let us see how to prepare.Very easy,quick and delicious.


Ingredients :

  1. Paneer or Cottage Cheese - 200 grams (Cut into 1/2 inch cubes)
  2. Green peas (fresh or frozen) - 1 Cup
  3. Tomato Purée - 2 Cups. Click here for the recipe of home made Tomato Purée
  4. Butter - 2 Table Spoons (Melted)
  5. Kasuri Methi - 1 Tea Spoon
  6. Kashmiri Red Chilli Powder - 1 Tea Spoon
  7. Garam Masala - 1 Table Spoon (Kitchen King Masala is the alternative)
  8. Milk (Not Heavy Cream) - 1 Cup
  9. Maida or All Purpose Powder - 1 Table Spoon(Not shown in the Photo)
  10. Salt to Taste
STEPS :
  • First, in a pan, heat the butter on low to medium flame.To that add the Paneer cubes as shown in the photo below.This step is needed, so that paneer is slightly fried in golden brown color hence attaining a good texture and taste.
  • Once, Paneer cubes are slightly fried from one are two side, bring flame to low and add Kasuri Methi,Garam Masala,Red Chilli Powder and Salt.Stir well until you smell a nice aroma of these spices.
  • To this add Green Peas and Tomato Purée.If the Purée is very thick.Add water such that all the ingredients can be cooked for around 5 minutes on medium heat with lid closed on it.
  • Take the lid off. Add a Cup of Milk and keep cooking on low to medium heat
  • Maida : Now why maida??? this is the one which gives the desired thickness,silky texture and great taste to this gravy. To the maida, add water such that it becomes like batter (not thick paste),remove lumps and add it to the boiling gravy.On the medium heat,keep sturring the gravy for around 2 minutes to avoid any lump.
  • Let the gravy cook for another 2 to 4 minutes and put the flame off.
  • Matar Paneer is ready to serve with any Roti,Naan or even Rice.
TIPS :
  • Never ever keep the butter on high flame.It may convert in to Ghee (Clarified Butter),there by giving the unwanted smell in this gravy (yes, we want butter but not Ghee here in)
  • The idea of 'Maida paste' works really great.Try and tell me.
  • Kasuri Methi :  Add little, it is heavenly.Add more than required, it is the spoiler as it over takes all other aromas.So be careful while adding it.Do not exceed the quantity more thatn 1Tea Spoon for the above measurements in the list

Monday, February 3, 2014

HOME MADE VEG BURGER/ALOO TIKKI BURGER

I know, you might have got the idea as the name suggests itself.So, come on, let us see, how to make it and make tummies of our loved ones happy happy :)

Ingredients :

  1. 2 big Potatoes - boiled
  2. green peas(Frozen or fresh) - 1/2 Cup
  3. Any Garam Masala - 1 Table Spoon
  4. Tomato Ketchup or Puree - 2 Table Spoon
  5. Salt to Taste 
  6. Crushed mint or Pudina (dry or fresh) - 1 Table Spoon
  7. All purpose flour or Maida - 1/2 Cup
  8. Butter (Melted to room temperature) - 1/4 Cup 

STEPS :

  • Except Maida and Butter, mix all the ingredients(From #1 to #6),mash it well and make a nice dough.And then make the Tikki or Patties as shown below
  • Dip the patties in maida from both the sides.
  • In a heated Tawa or Skillet, pour the butter and keep the patty to fry.
  • Now, once the bottom is well baked and fried, add some butter to upside and turn the patty upside down. (Repeat the step if needed)
  • Take out the patty after it is well fried from both the side.
  • Garnish this tikki with your fevorite veggies and cheese in a burger bread and serve.
TIP :
  • grated carrots,beet root etc can be added to the potatoes.

Thursday, January 30, 2014

HOME MADE TOMATO PURÉE

Needless to say that Tomato Purée is the most wanted item in the kitchen as it rules many of the cuisines world wide.

Let us learn, how to make it.The recipe is pretty easy and quick.


The following measurement makes around 250 ml of Purée

Ingredients :

1. Red Tomatoes - 4 (cut into halves)

STEPS:

  • Boil the Tomatoes in the pressure cooker.Not more than 2 whistles.Do not add water to Tomatoes while boiling in the Pressure cooker
  • After,they are boiled and cooled down, peel the skin and smash in the blender.
  • Now strain this purée with the help of a strainer as shown in the photo to separate the unwanted seeds from the purée.
  • Purée is ready to use.
TIPS:
  • Tomatoes can also be boiled without Pressure Cooker.Do not cut the Tomatoes but slightly cut the outer skin(It helps peeling the skin after boiling) and keep in a container.Add water accordingly and keep for boiling on the stove.They should be boiled in 15-20 minutes.

Monday, January 27, 2014

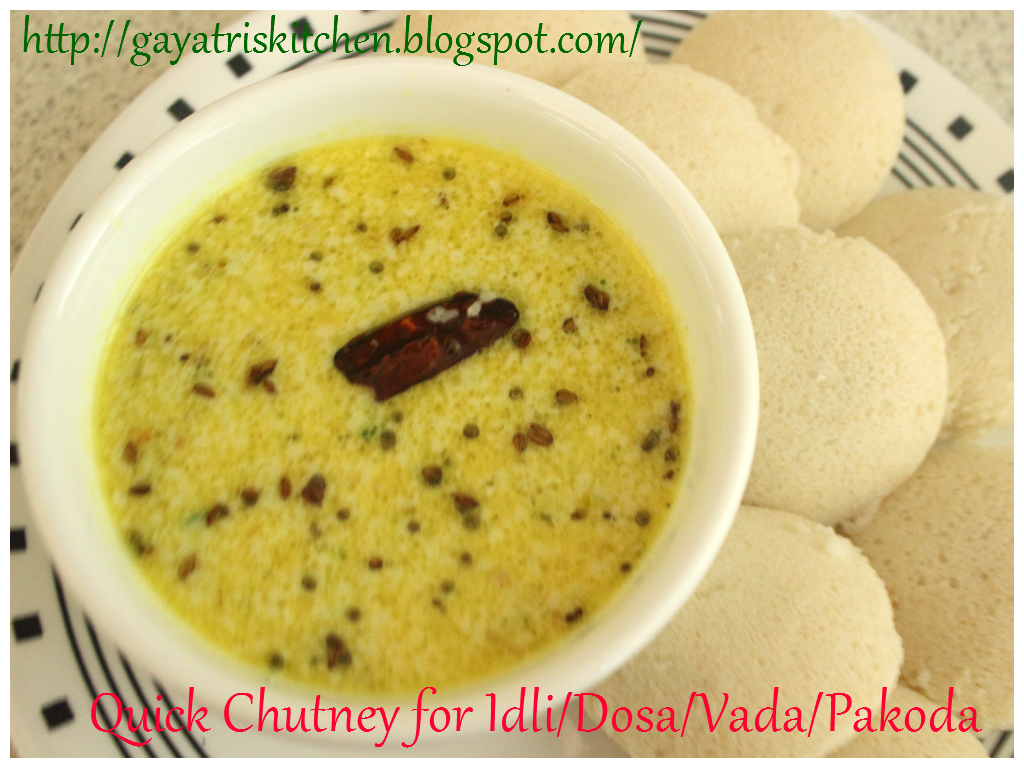
QUICK CHUTNEY FOR IDLI / DOSA / VADA / PAKODA

Yes!!!!! It just takes not more than five minutes to prepare.And believe me, taste is just heavenly.
 Let us see how to prepare this.

The following measurement makes around 4 bowls(Standard Size) of chutney and depending upon the consistency.

Ingredients :
  1. Grated Dry Coconut - 1 Cup (Now a days, it is easily available in the market)
  2. Green chillies - 2, chopped (No need to be chopped finely)
  3. Garlic Cloves - 2 to 3
  4. Gingler - 1/2 inch ,chopped
  5. Salt to taste
  6. Sugar - 1 Tea Spoon (Optional)
  7. Buttermilk - 2 Cups
  8. Oil - 1 Table spoon
  9. For Tadka - Cumin Seeds and Mustard seeds (1/2 Tea Spoon each),Udad Daal or Split Black Gram(1 Tea spoon), Asafoetida and Turmeric powder (1/4 Tea Speen each), 2 Dried red chillies.
 STEPS :
  • Except buttermilk and Oil, Transfer all the ingredients to grinder and grind well and transfer this dry chutney to a bowl.
  • To this add the butter milk.Depending upon the consistency of chuteny you prefer, you can adjust the quantity of buttermilk.Mix it well.At this point, chuteny is ready but without Tadka
  • In a pan, heat the oil.First add Mustard and Cumin seeds.After they start to splutter,add Udad daal and let fry on low heat.Flame should be low to just medium, because we do not want Udad daal to over burn.The Cruchy daal adds very nice aroma to this chutney
  • Put down the flame and Hing or Asafoetida,Turmeric and Dry chillies immediately and stir with spoon.Using this technique will save Hing,Turmeric and Chillies from over burning.
  • Pour this Tadka on the Chutney and mix well.
  • Chutney is ready to serve with Idli,Dosa,Vada etc.The tangy taste of curd is what makes this chutney so special
TIPS :
  • You can serve withou tadka too.But, Tadka adds nice flavor :)
  • If butter milk is not ready, just do this : After you take out chutney from the grinder, add yogurt or curd,some water and blend it and add it to the chutney
  • If you are curd lover,you can just blend the curd without water and add to this Chutney

Wednesday, January 22, 2014

HOW TO ROAST PEANUTS IN THE MICROWAVE/MICROWAVE ROASTED PEANUTS

Peanuts are used almost over India.But in Maharashtra specially, the roasted peanut powder is a must ingredient in daily meals.This is used in most of preparations of 'Bhaaji'.'Sabudana Khichadi' cannot be thought without roasted peanut powder.Other than this. it is used for preparations of 'Chutneys', 'Raita' etc.

All in all, It has to be always readily available at home.But roasting the peanuts has never been an easy task.I have seen my mother used to roast them in the pan which was to be kept on flames.Or there used to be commercial oven shops called 'Bhatti' from where one could buy them.But,store bought roasted peanuts contained 'sand grains' as the pan that was used to roast was kept on the hot sand and sand was obviously mixed.So,cleaning the peanuts was really difficult and time consuming.

May be the life style has changed but not the taste buds.With the tight schedule, it is really difficult to give time for such things.Thankfully, we have Microwave ovens now and this has made our life pretty easier.It takes just 3 minutes to roast certain amount of peanuts that too wihtout changing taste and texture.

Let us see, how it can be done.
Ingredients :

Peanuts - 1 Cup

Steps :

  • Take a Microwave safe Plate (Of around 10 inch Diameter).
  • Spread the peanuts on the plate as shown in the photo.
  • Keep the center part empty.Because,peanuts kept in the center get totally burnt.They just turn black.
  • Now, keep the plate inside the microwave and heat for 2 minutes and 30 seconds(Do this by pressing the '30 seconds' buttons 5 times which is there for just heating').
  • This much of heat is enough to roast them.
  • Take out and let it cool down.They become crunchy after cooling down.
TIPS:
  • Now the peanuts are ready to be powdered
  • If you want, you can take out the skin as it becomes easy after roasting.
  • Depending upon your Microwave wattage, timing may slightly vary.

Thursday, January 9, 2014

Turicha Dali chi Ussal/तुरिच्या डळिचि उसळ

Turichi daal(Marathi Name) means 'Pigeon Pea Split' or popularly known as 'Dal or Daal'.
I have been eating this ussal since my childhood.I used to be more than happy whenever my mom prepared this.
The secret I would like to share,I will write in TIPS section.Now let us learn to make this easy,tasty and simple ussal.

The following measurement serves around 3-4 people.


Ingredients:

  1. Tur Daal or Split Daal - 1 Cup
  2. 1 Onion - chopped
  3. Garlic- 1 Table Spoon,chopped
  4. Kanda Lasun Masala - 1 Table spoon (Substitute is red chilly powder)
  5. Coriander leaves - for garnishing
  6. For Tadka - Mustard Seeds and Cumin seeds(1 Tea spoon each)  and Hing and Turmeric Powder (1/4th Tea Spoon each)
  7. Salt to taste
  8. Oil for Tadka - you can adjust the quantity as per your wish

Steps :

  1. First we will see, how the daal should be cooked.In a container, add around 4 cups of water with daal and let it boil medium heat.Keep checking the consitency of daal.We want daal such that,it should be cooked but should not turn to be a paste.You can imagine the consistency of daal in the second photo.In that you can see,each grain is cooked and daal does not look mashed.Please note, it is very important to have a good consistency.
  2. Drain out remaining water.
  3. In a pan, heat the oil.Add Mustard and Cumin seeds,Hing,Turmeric.
  4. To this add chopped onions and garlic.
  5. When Onions and garlic are cooked, add Kanda Lasun Masala and Salt and stir for 2 minutes so that masal is fried well.
  6. At last, add the daal,mix it well.Keep stirring for 2-3 minutes.Let remaining water evaporate. This ussal is supposed to be dry.
  7. Garnish with Coriander leaves.
  8. Your Ussal is ready to serve along with Roti,Chapti,Rice etc.

TIPS:
  • As I have already mentioned,please take care that dal is not ever cooked.
  • Do not add masala at the beginning as it may burn and add bad essence.
  • Add water if needed while cooking the daal.
  • You can adjust the taste of spice as per your wish.
  • As I said,here comes the secret....Add some oil (that you use in your kitchen for cooking) to ussal in your plate and then eat with jowar roti and Raw onion.And believe me, it is just heavenly and you will not ask anything after you eat this.I personally do not like hot jowar rotis.I like which is cold and I deliberately keep it for 5 to 6 hours and then eat.Many people like Jowar roti this way.The above combination tastes even better when eaten with this cold roti.


Sunday, December 8, 2013

PALAKachi Patal Bhaji/पलकाचि पातळ भाजि/Spinach and Besan Gravy

Another authentic Maharashtrian way to cook the Palak or Spinach.This curry dish is one of my favorites in daily meals.It is very easy to make.The taste is sweet-sour.For a change, it is not a dry vegetable dish but comes with gravy.

I am sure,you too will fall in love after you eat this.Let us see how to make it


Ingredients :

  1. Chopped Spinach - 3 Cups
  2. Besan or Chickpea Flour - 4 Table Spoons
  3. Green chillies,chopped - 3
  4. Garlic chopped - 2 Table Spoon
  5. Tamarind - 1 Table Spoon
  6. Jaggery - 1 Table Spoon
  7. Salt to Taste
  8. For Tadka - Mustard and Cumin seeds(1 Teas SPoon each),Asafoetida(Hing) and Turmeric(1/4th Tea Spoon each)
  9. Oil for Tadka- 2 Table spoon 
Steps :

  • Pressure cook the Spinach along with green chillies and one table spoon of Garlic.
  • Make around 2/3rd cup of Besan paste by adding water as you see in the picture above.
  • Heat Oil to medium heat.Add Mustard and Cumin seeds,Hing,Turmeric and remaining chopped Garlic.
  • To this tadka,gently add the spinach.Let it cook for 5 minutes
  • now add 3 cups of water.Add salt,Tamarind and Jaggery immediately and allow water to come to boiling.
  • Now comes the part where you have to take care.Lower the heat.Mix besan paste well and start adding to water with intervals.At the same time keep the water stirring to avoid the lumps.Keep stirring for a minute.
  • Now you can bring the flame to medium.As soon as you find that the Besan is cooked,put the flame off.
  • Your palak chi bhaji is ready to be served with Chapti,Roti or Rice
TIPS :
  • Never add Tamarind and Jaggery at the end because you are going to put the flame off within 5 to 7 minutes after you add Besan for,1. Besan gets cooked very quick and 2.To avoid over thickening of the gravy.In this case,jaggery is not mixed well and you will feel the raw smell of Tamarind.
  • If you want more sour and sweet taste,you can increase the quantity of Tamarind and Jaggery.
  • Gravy thickens after it is cooled down.Hence, add the water to get the required consistency
  • If you like, you can add peanuts with Palak while cooking in the Pressure cooker.

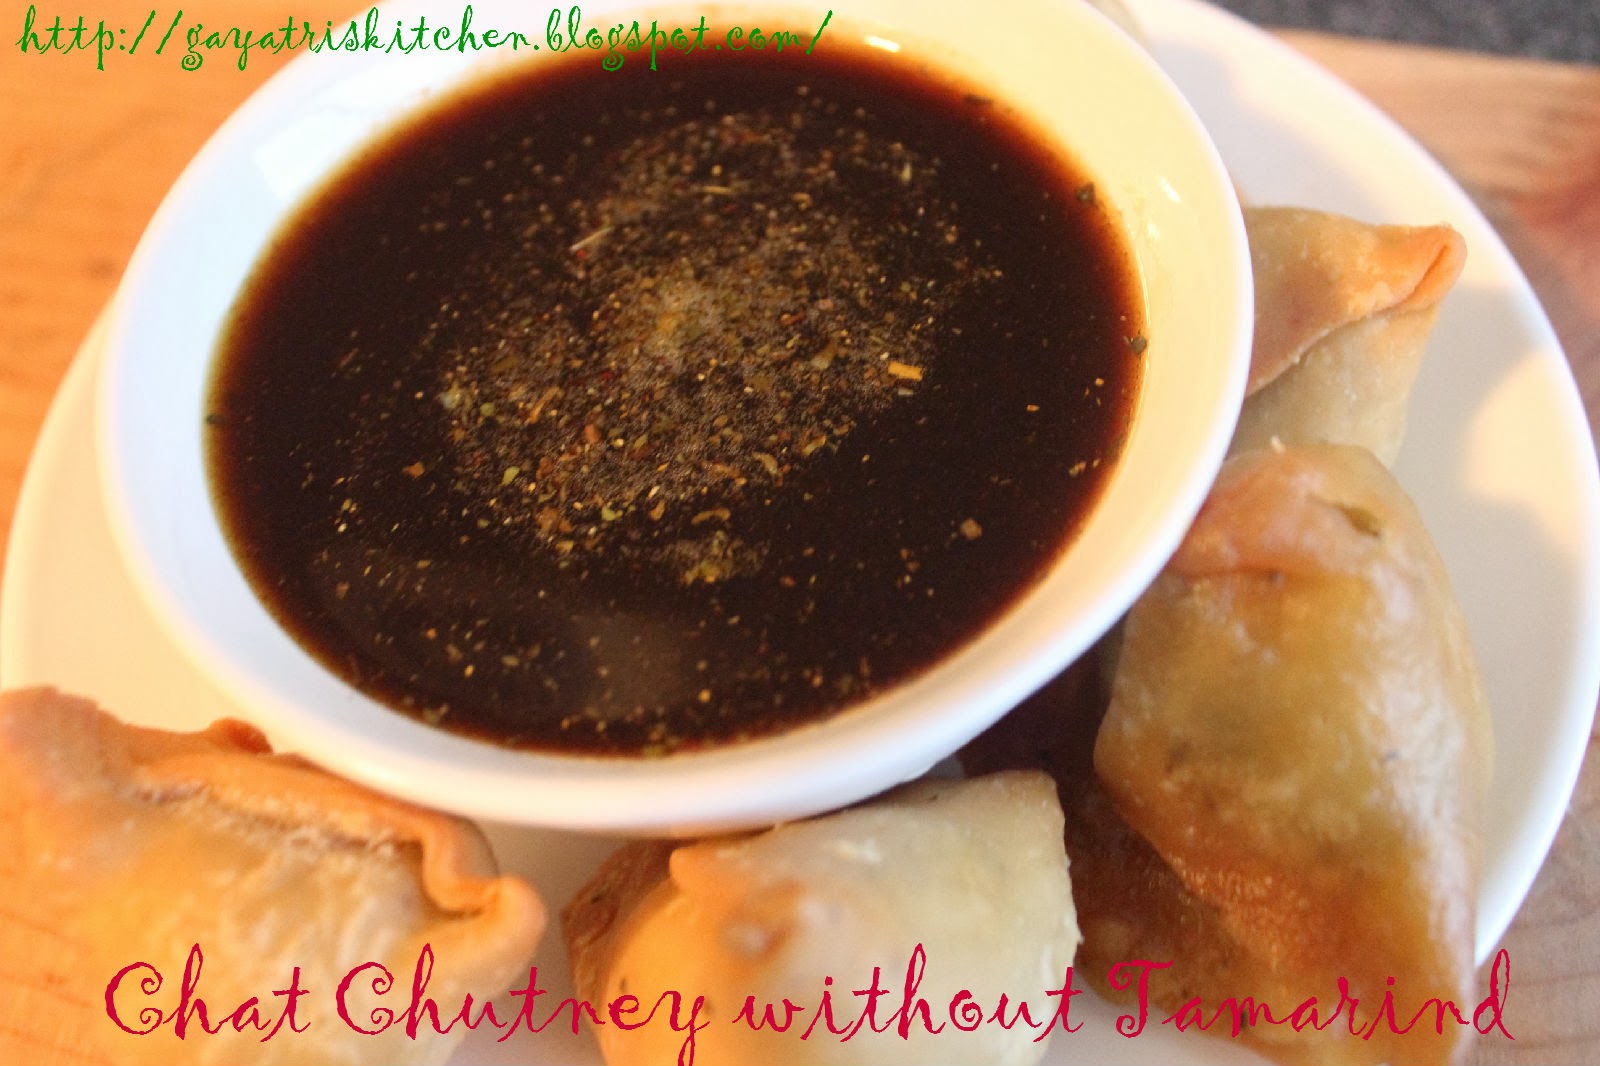
Chat Chutney without Tamarind

Surprised???? But it is true.I thank my friend Kriti, from whom I learnt this non acidic cutney.Usually this chat chutney consists of Tamarind.We all know that Tamarind is acidic.It definitely leads to acidity if eaten with empty stomach.I did this mistake once.I and my family was in search of Indian Restaurant.Finally we found one.I was very hungry and attacked Samosa and this chat chutney which was being served as starters.And needless to say,I spoiled my whole day with unbearable headache out of acidity.

But thankfully,I found this nice recipe to make chat chuteny.Now you too can as many chat items as you wish as starters without having tension of such silly incidents.It tastes as goods as traditional tamarind chutney.

Believe me,it is really a great item and very easy to make.


Ingredients :

  1. Jaggery - 1 Cup
  2. Sugar - 1 Cup
  3. Amchur or Dry mango Powder - 1/2 cup
  4. Water - 4 Cups
  5. Cumin and Coriander powder(Roasted) - 1 Tea spoon each.
  6. Salt to taste
Steps :

  • In the, water add Sugar and keep to heat up on medium flame.
  • As soons as you the Sugar is melted,add  Amchur powder and salt and let the mixture boil at low to medium flame.
  • If needed, add more water and let Amchur boil well.
  • Add Jaggery and let it melt.
  • Add Cumin and Coriander powder.
  • Put the flame off.
  • The chutney is ready to be served with Samosa,Kachori or any chat
TIPS:
  • Even if the chutney is very watery,do not worry.As it cools down, it gets thickened.
  • If you feel that it is still watery even after cooled down.Boil it for some more time and let it cool down again. 
  • Add Jaggery at the later part to avoid as Jaggery gets  burnt quickly.

Tuesday, November 26, 2013

आमटी/ತೊಗರೆ ಬೇಳೆ ಸಾರು/Amti or Aamati

'Amti' (aa-ma-ti) - is curry made up of pigeon peas which is a legume.This is know as 'Toor Daal' in Marathi.
Amti is must in every Maharashtrian family for daily lunch and dinner.This is mostly eaten with rice but goes well with other breads too.This is an authentic Maharashtrian curry.The thing that makes this curry to be unique in taste is 'Godaa Masala'.Goda Masala is daily and all purpose masala that is used in almost every house of Maharashtra and it is purely home made.It tastes totally different from 'Garam Masala' that we get in market but at times Garam Masala can be used as substitute for Goda Maasala.

Please Note : Godaa Masala and 'Kaanda- Lasun Masala' are two different things.Goda masala never contains Onion and Garlic.

Now,let us learn how to make 'Amti'

                  
  The following measurement of ingredients makes 3 to 4 bowls of Amti

Ingrredients :

  1. Pigeon peas(Toor Dal) - 1/2 Cup
  2. Goda Masala - 1 Tb Spoon (In case you do not have, you can definitely use Garam masala you get in market)
  3. Fenugreek Seeds(Methi Seeds) - 1 Tea Spoon
  4. Cummin Seeds and Mustard Seeds  1/2 Teaspoon each
  5. Hing(Asafoetida ) and Turmeric Powder - 1/4 Tea spoon each
  6. Curry leaves - 4 to 5 (I could not add them as I did not have that time)
  7. Dry RedChilli -2 (Optional)
  8. Red chilli Powder - 1/2 Tea spoon
  9. Jaggery - around a dice of 1 inch
  10. Tamarind paste or whole without seeds - 1 Tea Spoon
  11. Salt to Taste
  12. Fresh grated coconut and Coriander leaves - to garnish (You can also use dry coconut flakes)
Steps :

  • Pressure cook the daal such that it is boiled finely and is not raw or half cooked.
  • Now in a Pan, heat the oil on medium heat for Tadka.
  • To that add Mustard Seeds and Cumins Seeds and Methi Seeds..Once they crackle,lower the heat and add Hing and Turmeric powder,Red Chilli powder,Dry REd Chillies, Curry leaves.
  • To this Tadka, slowly add pressure cooked Toor Daal.Add Goda Masala,salt, jaggery and Tamarind.
  • Add water depnding upon how much consistency you want.Amti is not supposed to be as thick as dal fry.So add water accordingly and let it boil for some time.At this time add Coconut and Coriander leaves.
  • If you think that it is getting too thick, add water accordingly.
  • Amti is ready to be served.
TIPS:
  • Amti gets thickened after its cooled down.So before serving, you can little water and reheat it.
  • Instead of Tamarind, you can use Kokam (Also known as Aamsul) or Tomato for sour taste.
  • Make sure that Fenugreek Seeds are not raw as this raw is the great spoiler.But it sould not be over fried either.Take care while preparing Tadka.

Friday, November 22, 2013

TAWA PANEER TIKKA

I know.....I do not have to give any introduction about this particular item.So....let us quickly learn how to make Paneer Tikkas that too without 'Tandoor' or 'Oven'.We will make these tikkas on 'Tawa or Skillet'.
 The following measurement of ingredients serves 4 people.

Ingredients : 

  1. Paneer or CottageCheese - 400 grams cut into 1 inch cubes
  2. Curd or Yogurt - 2 Cups
  3. Garam Masala - 2 Table Spoons
  4. Cumin Powder - 1/2 Table Spoon
  5. Coriander Powder - 1/2 Table Spoon
  6. Fennel Seeds - 1/2 Table Spoon (Crushed
  7. Mint paste or powder - 1 Table spoon
  8. Salt to taaste
  9. Lemon Juice - 2 Table Spoons
  10. Oil to shallow fry - 3 Table soons
Steps :

  • With the help of cotton cloth,take out water from the curd to some extent.This will keep the marinate thick.
  • To the Curd, add all the ingredients except oil and lemon juice and mix it very well.At the end, add 'Lemon Juice' and give a nice mix again.
  • Now marinate Paneer cubes with this mixture.Keep in bowl,close it and refrigerate for 1 to 2 hours.
  • Now, in shallow pan or Skillet(Tawa) just like you can in picture above,add oil and heat it on medium flame.
  • To the oil, add these marinated Paneer cubes.You can either use the wooden sticks  or keep them individually as shown in the photo.
  • Do not heat the pan to high at all.Keep on turning the sides of Paneer to get it cooked from all the sides.
  • Paneer Tikkas are ready to serve.Serve hot with onions and Lime or Lemon.
TIPS:
  • I recommend to take out some water from curd.This will stop the marinate dripping from the paneer and you from being disappointed because of mess.
  • Keep the marinated Paneer in the bowl.Because when you take it out from fridge after 1 or 2 hours, you will see remaining water is deposited at the end again keeping curd thick.This would not happen if you choose to keep the marinated Paneer in a plate or flat container

Tuesday, November 19, 2013

BREAD CHEESE BALLS

https://www.facebook.com/GayatrisKitchenPhotos

Follow Me on Pinterest

I thought of trying this recipe yesterday and it turned out to be very delicious.Making any dish with cheese makes us think twice before.Because it melts,one cannot just think of mess that occurs.So I thought,I will try this.You will not get to see the cheese when it is ready but the taste of cheese is well blended in these balls after they are fried well.Our objective is to get the nice taste and smell of cheese in this recipe....

The balls turn out to be very crispy and nice.Go very well with Tomato sauce,Ketch up or you can try some other dippings.

The following measurement makes around 15 or more balls.

Ingredients :

  1. Maida or All purpose Flour - 1 Cup
  2. Corn Flour - 3 Table Spoon
  3. Bread Crumbs - 1 Cup
  4. Grated Cheese - 2 Cups (I had used Mozzarella cheese)
  5. Red Chilli Powder - 1 Tea Spoon
  6. Salt to taste.
  7. Baking Soda - 1 Pinch (to be precise,less than 1/4th teas spoon)
  8. Oil to fry the balls
Steps :
  • Mix all the ingredients well.At the sme time keep oil to heat up on medium flame.
  • To the mixtue, keep adding water as required to make dough out of it.
  • Make the balls and deep fry them.You can see that cheese is not at all released and mixed in oil.
  • Fry on medium to low flame.I would recommend low flame because it gets nice color and texture very soon on medium flame but the very inner part of the ball remains uncooked and hard.
  • Yes, only thing is a little patience is required while frying but.

BREAD CRUMBS - HOME MADE

Some food items taste great when they are garnished or mixed with 'Bread Crumbs'.Now a days they are easily available in market too.But here comes the great easy and quick way to make crumbs at home.
You can use this while making cheese sticks,onion rings, Soups and in many more items.


The following measurements makes around 1 cup of crumbs

Ingredients :

3 Plain Bread slices

Steps :
  • Keep the bread slices in a Microwave Proof Plate.Do not stack them, keep separately.
  • Reheat for 2 minutes.
  • After taking out from the Micro Wave, let it cool down completely.
  • Crush with your hands.
  • Bread Crumbs are ready to use.

Friday, November 15, 2013

ಗೋಲಿ ಭಜಿ/Mangalore Bhajji/Mysore Bhajji/Goli Baje

Me being from North Karnataka,I always knew this Bondas as ,'Mysore Bhajji'.I still do not know the story behind this name. I prepared this bhajjis for a friend of mine who is from Bengaluru(B'lore), she told me that these are also called 'Goli Bhaje'.Then I stilled researched on internet and got to know another name called 'Mangalore Bhajji'.This recipe is one of the specialties of Karnataka Cuisine.

Well,whatever the name is but,but what I know is these are just delicious and very cute ones.For a change,These bhajjis are little sweet in taste.These are soft and spongy bhajjis unlike all other pakodas or bondas which are always supposed to be crispy and spicy.

I am also going to let you the big mistake I once made while making these bhajjis at the end of this post.If you follow the method and steps exactly,they will definitely turn out to be perfect ones.
These Bhajjis are small in size.After frying,the Bhajji becomes almost double the size of dumpling you put to the oil.


The following measurement makes around 15 Bhajjis.

Ingredients : 
  1. All purpose flour or Maida - 1 Cup
  2. Sooji - 3 Table spoon
  3. Yogurt - 2/3rd Cup
  4. Baking Soda - 1/4th Tea spoon
  5. Cummin seeds - 1  Table spoon
  6. Green chilli,chopped - 1
  7. Ginger,Chopped - 1 tea spoon
  8. Sugar - 3 Table spoons
  9. Salt to taste
  10. Oil to fry the Bhajjis
Steps : 
  • In a bowl,add Maida,Sooji,Yogurt,Baking Soda,Salt and Sugar.
  • Mix the ingredients to make a dough.Keep adding water as needed to make a nice dough as you can see in the picture above.The consistency of the mixture should be like a 'Loose dough' or 'Thick batter'.Just like batter of Medu wada.Keep on stirring with hand so that yogurt and Baking soda combine well resulting into nice airing.You can see air popping out of the batter while stirring it well.
  • Keep the batter for 10 minutes.
  • Till then grind Cumin seeds,Green chilli,Ginger all together and mix it with batter.
  • By now Batter is ready to go to oil.Keep Oil heating on medium flame.
  • Wet your hands, make small dumplings of batter and drop into oil slowly.Fry them on medium to low heat.They start becoming like a ball within seconds and automatically attain a nice round shape
  • Bhajjis are ready to be seerved with Coconut Chutney.
TIPS:

  • Do not fry on high heat ever.They might get color but are not cooked well from inside.
  • I would recommend to use yogurt with normal temperature.If possible,keep yogurt out of the fridge around 2 hours before you prepare the batter.
  • The bhajjis are ready to be fired right away after batter is ready.Do not keep it to ferment for more than 1 hour.
  • Sooji is added to make the outer layer bit crispyDo not add sooji more in quantity.It leads the outer layer to be hard rather than crispy.You can also add Rice flour with same quantity instead of Sooji.  
  • Now comes the mistake I made:I had to make bhajjis in large amount and hence I prepared batter on the previous evening.In the night I kep it insise the fridge.Next morning again kept out of the fridge to get it to normal temperature.But to my shock,The bhajjis turned out very stiff.They were not hard but were not spongy and fluffy either.So next day I mean today,I again prepared a fresh batter which you can see in the picture.I took to make bhajjis within 10 minutes and to my pleasant surprise,they were really spongy,soft and were well cooked from inside.
  • One small tip to know if your batter is perfect is,put a small dumpling into oil which is heated on medium heat.Within few seconds,he dumpling should pop up from the bottom of pan and start floating on oil there by becoming a nice fluffy ball.

Wednesday, November 13, 2013

PEPPER RASSAM - Quick Version

Rassam is a mouth watering curry.With white plain rise, it really gives heavenly feeling.Rassam has been my all time favorite curry.I have tried to come up with quicker version here.The efforts are very less while making this Rassam.May be ingredients look more in number, but process is very easy and quick.

The following measurement serves 2 -3 people sufficiently

Ingredients : 
  1. 2 Tomatoes (boiled or pressure cooked)
  2. Oil for tadka - 3 Table spoon
  3. Things to go in oil - Mustard and Cumin seeds( 1 tea spoon each), hing and turmeric powder (1/2 tea spoon each),Curry leaves (5-6)
  4. Garlic - 8 to 10 cloves
  5. Green chillies - 3-4
  6. Pepper seeds - 10
  7. Salt to taste
  8. Tamarind paste - 1 table spoon
  9. jaggery - a chunk of 1 inch. 
Steps :

  • Smash the bolied Tomatoes well.No need to strain out.
  • Heat the oil on medium flame and add mustard seeds,Cumin seeds,hing and turmeric. Once they are fried,add the smashed tomatoes and fry well for around 5 to7 minutes.
  • To this add around 6 cups of water and let it boil.
  • Now, Grind the garlic,green chillies and pepper together.Add this mixture to the rassam along with salt,tamarind and jaggery.
  • Close the lid for around 5 minutes.After 5 minutes take out the kid and let it cook for another 15 minutes.
  • If needed, add some more water as this rassam is supposed to be watery and not thick curry.
TIPS:

  • If you do not want to add green chillies,you can add 1 teas spoon of red chilli powder in oil
  • You can adjust the quantity of green chilli, red chilli powder and pepper according to the taste you want.
  • You can skip tamarind if you want to.

Friday, November 8, 2013

METHI THEPLA(Indian Flat bread with Fenugreek Leaves)/मेथि थेपला

Needless to say that these Theplas or Dhebras are identity of Gujarat.This is a very authentic dish of Gujarat.These Theplas are very easy,quick and simple to make.There are many variations in the ingredients,especially the flour used while making the Theplas.Here, I am going to explain,how  to make Theplas using Wheat Flour (Gehun ka Atta) and Millet Flour (Bajre ka Atta).


The following measurements make around 6 Theplas

Ingredients : 

  1. Wheat Flour and Millet Flour - 1 Cup each
  2. Fenugreek leaves(Methi leaves) , Chopped - 2 Cups (You can also use Frozen Fenugreek leaves available  in the market)
  3. Tamarind Paste - 2 Table Spoon
  4. Green Chillies,chopped - 2
  5. Garlic Chopped - 1 Table Spoon
  6. Sesame Seeds - 2 Table spoon
  7. Yogurt/Curd - 1/2 Cup
  8. Jaggery,Shredded - 2 Table Spoon
  9. Salt to Taste
  10. Turmeric Powder - 1 Table Spoon
  11. Oil - 2 Table spoon to knead the dough and some more oil,take as per your diet tobake the Theplas
Steps :

  • Except the oil, Take all the ingredients mentioned above in a mixing bowl.Mix it well.
  • Now add water to make a fine dough taking care that it does not become very loose to hold.
  • Now add 2 table spoon of oil and knead it again so that dough does not stick to your hands.If you feel that oil is needed, you can add accordingly.
  • Make The dough balls of the size you want(usually around 2 inch diameter) and flatten it with Rolling Pin(Belan)
  • Put it on the Skillet which is preheated on medium flame.Before putting the thepla, pour some oil on skillet and spread and on that put the Thepla.Now spread oil on the upper side too.
  • Bake thepla on medium to High heat.Take care that it is neither remaining half-baked nor over- baked.
  • Your Theplas are ready to serve.

TIPS :
  • You can use 1/2  table spoon o Kashmiri Chilly powder instead of green chillies.
  • I you love tangy taste, then you can increase the quantity if tamarind and jaggery.Similary you can reduce the quantity if you do not like.
  • I would recommend to add sesame seeds in dough rather than applying them on Theplas after they are put on skillet.This assure that sesame seeds are mixed well.