Showing posts with label Chaat ka Thela. Show all posts

Wednesday, February 10, 2016

POORI | PURI for PANI PURI | PURI FOR GOLGAPPA or PUCHKA | पाणी पुरी | पानी पूरी

Yes, I am completely aware that this Chat item does not need nay introduction.These little cuties are like heart beat of Indian Snacks.But, these Puris which are hundereds and thousands in numbers always made me wonder as to how are they made,how do they remain crispy and round shape all the time,how do they puff and not sit back again.Not only me,many of us have these questions.

I never thought that I would ever make them all by myself one day.When I tried my hands on them, they came out excellent.Each Puri was puffed and stayed that way physically until they were all gulped by me and my husband.

Follow this Rule of Thumb and each Puri is just another name of perfection : Keep the Dough Moist.Do not let it dry.


INGREDIENTS :

  1. Fine Sooji/Rawa/Samolina - 1 Cup (Make sure that Sooji is really fine and not coarse)
  2. Water - 1/4 Cup and as needed
  3. Salt to Taste
  4. Oil for Frying - Depends on how many Puris do you want fry at a time.
STEPS

KNEADING THE DOUGH:

  • In a bowl, take Rawa or Samolina.Add salt.Star adding water little at a time.Do not add all the water at once.
  • We are making dough which has to be stiff.At the same time we also want it moist,well bound and not dry at all.
  • After dough,is knead, take it out on surface.Knead and spread.then fold,press and knead again.Repeat this for 3 to 5 times.You can see the process in photo below.
  • Make 3 to 4 parts,make dough balls such that ready to roll.
  • Keep it moist in damp paper for around 30 to 45 minutes.See the picture below.
ROLLING THE DOUGH
  • Now, roll each dough into thick Roti/Flat bread as you see in photo.The dough does not spread easily.So be prepared.
  • Then using a pizza cutter or Sharp knife,make squares of about an inch each as you can see in the photo.
  • Keep these square chips covered in damp paper as you see in the photo.
  • Roll each Square into thin Puri. The thinner the better
  • Make sure that the surface of Counter top and rolling pin is plain and spotless.
  • Roll them thin but gently.Make sure edges remain even and there is no tear in puri.
  • IMPORTANT : Keep the square chips covered in damp paper as you see in the photo.
  • NOTE : This is my first batch where I did not cover the cut squares,and the Puris (Some of them) resulted in flat Puris.No!!!! they are not going to be wasted.I am going to use them while making PAPDI Chat or Will beark into pieces and add in BHEL.
FRYING
  • Keep Oil heated,ready to fry before you start to make Puris.
  • Make puris and drop in oil very gently,making sure that the rolled Puri does not get folded and remains flat.
  • Puri will come all puffed out of oil,floating elegantly :-)
  • Fry both sides until golden brown.
COOLING DOWN :
  • After frying, place on paper towel then later transfer it to another surface to cool down completely and separately.
  • Do not keep puri over lapped.
  • Later store in air tight container.
SERVING : 
  • Make Pani Puris with Green Chutney, Meethi Chutney,Masala Pani, Frasan and serve your loved ones.
TIPS:
  • Use cutting board when making squares,so that counter top is not damaged.
  • Again, Keep the dough moist through out

Wednesday, September 30, 2015

2 MINUTES CUP CAKE DHOKLA | NO ENO OR FRUIT SALT

Before sharing the recipe, I would like to say something.Dhoka is my "the favorite snack".But I was never successful in making Dhokla ever since I started cooking.Be it home made batter or Store brought batter,My Dhokla making was always a disaster.But some where in my heart, I was not ready to give up on this recipe.

So I decided to try this recipe for the first time.I was not sure it it was going to be a success or not.It was all experimental.But still decided to click the step by step photos.Because my inner voice was telling me that I was going to succeed today.And yes!!!! I finally made it.

Another challenge was "Not using ENO or FRUIT SODA" in the recipe.So I decided to go with traditional method of making batter and instant method of baking it in Microwave and new method of making in Silicon Cup Cake Moulds...SO,I would say the method is kind of fusion here and hope that you all will like it.

The Reasons for not adding ENO is :

  1. It is a medicine.So I prefer not to use in food as a short cut.Let us allow it serve it's real purpose.And hence I have never been comfortable with using ENO as substitute.I am sure,many of you have that feeling too.Hence I am going to use the ingredient that is meant for Baking.
  2. Baking powder is meant for baking so why not use it
  3. You do not have to depend on ENO all the time to make Dhokla.Just a little preparation and have your dhokla with proper ingredients.Also,Baking powder helps for better bindng.Dhokla will be fluffy and firm.
  4. I could make Pure besan Dhokla and did not have to use ingredients like Rawa or Semolina for binding.Rawa gets soggy and we think that Dhokla is fluffy.But this is not the case.One should be able to see the pores when cut in the middle as you can see in the photo number three below.


I am giving step by step recpe of how I exactly did today.As it does not have ENO in it for instant raising, we would need soaking the batter for 6 hours.But, after that each batch (set of 6 cup cake moulds with batter)  took only 2 minutes to bake in the Microwave (Mine is 1000 Watts).

If you want to make as evening snack, Make the batter in in the morning and keep it aside.You all set for evening.Ekdum Tension Free :D

The steps look lengthy becuse I ahve entered every detail of my experiment here.But it is very easy and hastle free to make.

Serving : I was able to make 16 Dhokla Cakes with the measurements below.


INGREDIENTS :

  • BATTER
  1. ChickPea Flour or Basan - 1 Cup (Sifing is recommended here )
  2. Plain Yogurt  - 1 Cup (Beat the yogurt and microwave for 45 seconds).It becomes to room temperature and gets little sour.
  3. Sugar - 1 Tbsp
  4. Salt for taste
  5. Lime juice -  from One whole Lime (Makes around 4 Tbsp of Lime Juice)
  6. Baking Powder - 1 - 1/2 Tsp (We are going to need it at the end)
  • SWEET SYRUP
  1. Water - 1 Cup
  2. Sugar - 2 to 3 Tbsp
  3. Salt to taste
  4. Lime Juice - from Half Lime/Lemon
  • TEMPERING OR TADKA
  1. Oil - 3 Tbsp
  2. Mustard and Cumin Seeds - 1 Tbsp each
  3. Hing - A Pinch (Optional)
  4. Turmeric Powder - 1/4 Tsp
  • GARNISHING
  1. Grated Cocnut  - 1/4 Cup (I have used the fresh one)
  2. Finely Chopped cilantro - 1/4 Cup
STEPS : 
  • MAKING BATTER
  1. In a large bowl Take besan.Add the beaten Yogurt,Salt and Lime juice. (DO NOT add baking Powder at this point).
  2. Mix everything well, such thatt all the lumps disappear.
  3. The batter should not be too runny.The consistency should be like Idli batter or little thicker.
  4. If you think you need to add little water.Use the warm water and add spoon by spoon.
  5. Keep the batter closed for 6 hours (The time was around 10 AM in m clock when I kept the batter in the Oven for soaking and fermentation.I took out the batter at 4 PM to make the Dhokla)
  • MAKING DHOKLA
  1. Keep Silicone Cup Cake Moulds Ready and greased.Mine did not need greasing though.We are going to keep 6 moulds at a time in the Microwave for 2 minutes.So you can keep ready the next batch of 6 moulds with batter filled in them.
  2. Now you will see that the batter is thickend so you will need few sppons of water to loosen it.Again,use the Warm water.
  3. Once you get the good consistency of batter,add Baking Powder and start stirring immediately.You will bubbles when you add it.
  4. Now start stirring and mixing well.You will see that batter is becoming fluffy and lighter.Let it be that way.Make sure that Baking powder is really mixed well.
  5. Now Fill each Cup Cake mould until half with the batter as you see in pic.Keep those moulds (6 of them) in the Microwave safe palte and let it bake for 2 minutes on the highest wattage.
  6. They are ready in 2 minutes.
  7. Now, again keep the next batch.
  • TEMPERING OR TADKA
  1. Heat the Oil on medium flame.Add Cumin and Mustard Seeds and let them fry well.We do not wan them to remain raw.Or else,mustard seeds taste bitter.
  2. Once they are fried well,put flame off and add Hing and urmeric Powder.
  3. Tadka is Ready.
  • SWEET SYRUP
  1. In a bowl (Big enough such that you can easily dip Dhokla Cup cake) add Water,Salt,Sugar and Lime juice and stir well until sugar and salt are completely dessolved.
  • SERVING DHOKLA
  1. Take Dhokla out of the Silicone Mold
  2. Dipping In Sweet Syrup - So instead of pouring this syrup,I did little different.Dip teh Cake in the syrup upside up for few secinds,so that syrup is well absorbed by cake and keep it in the plate. 
  3. Sprinkle Cocnut and Cilantro.
  4. Now sprinkle little bit of Sweet syrup (Optional)
  5. Then add Tadka
  6. Cupcake Dhokla is all set to serve to your loved ones :)

TIPS : 
  • Make sure to check the wattage of your Microwave.Because time needed to bake may varry depending upon power of the Microwave.
  • Youcan also garnish with finely chopped Green chillies.


Monday, July 20, 2015

हिरव्या वाटाण्याचि/मटाराचि उसळ | Hiravya Vatnyachi/Matarachi Usal | GREEN PEAS USAL USING GODA MASALA

It is very simple to prepare.We are using "Goda Masala" or "गोडा मसाला" as main spice for making this Usal.This Usal tastes really tasty.
You can use this as evening snacks too. Sprinkle some Raw Onion, Sev or Bhujia. Squeez Lime and Serve with Bread.So you can make it in bulk and give it a totally different twist for evening Snack.
Now a days Goda Masala is available in market which is pretty much similar to the Home made one in taste.

NOTE : GODA MASALA and GARAM MASALA are NOT the same.

INGREDIENTS:

  1. Dry Green Peas - 1 Cup (Soaked for 8 to 10 hours)
  2. One Onion - Chopped
  3. Tomato Purée - 2/3rd Cup (If puree is not available, use 2 madium sized Tomatos). Click here for Home made Tomato Purée recipe
  4. Oil - 4 Tbsp
  5. For Tadaka - Cumin and Mustard Seeds (1 Tsp each) and Asafoetida and Turmeric Powder (1/2 Tsp each)
  6. Bay leaves - 4
  7. Godda Masala - 3 Tbsp
  8. Red Chilli Powder - 1/2 Tsp
  9. Garlic and Ginger (Minced) - 1/2 Tsp each
  10. Butter - 2 Tbsp (Optional)
  11. Cilantro for Garnishing
  12. Salt for Taste
STEPS : 
  • Pressure Cook Soaked Green Peas until they are really soft.I let it whistle for around 7 times.
  • Let it cool down or atlest wait until pressure is completely gone.
  • In a pan, Add oil and let it heat.To that, add Mustard and Cumin Seeds.Once they start spluttering, add chopped Onions,Salt and Bay Leaves.
  • Now add Asafoetida and Turmeric Powder.(Adding these two thing later keeps them from burning).
  • Once the Onions come to almost cooked, add Goda Masala and sautée for 1 minute.
  • Now add Tomato Purée and let it cook well.Let it cook until all water is evaporated and you see thick paste.
  • Add boiled Green Peas or Matar.Add water if needed according to consistency of gravy you like.
  • Add minced Garlic and Ginger,close the lid and let it cook for 8 to 10 minutes on Medium flame.
  • Put the flame off.Add butter and garnish with Cilantro.
  • You can serve it with Rice,Chapati or Roti etc.
TIPS:
  • Do not exceed the quantity of Ginger and Garlic or else the real taste of Other spices will be lost.
  • Add water as needed to achieve the desired consistency of Gravy.

Tuesday, February 3, 2015

MEXICAN POTATO SALAD

No oil,no heavy sauces and no time consuming.I was craving for something very tasty dish for mid time snack but low in calories.I had one boiled Potato but did not want to eat just like that.So,I thought I would try this version and to my surprise it was a great outcome.I was proud of myself that I invented something really delicious that could satisfy my taste buds and without compromising my health.

Again this leads to a great 'Portion Control' as you will eat limited amount of Potato and more of vegetables or Salads.If you see the amount of Cheese I have sprinkled,one can literally count them.

INGREDIENTS:
  1. Medium sized boiled potato - 1,Chopped
  2. paprika - 1 Tsp
  3. Mustard Sauce - 1 Tsp
  4. Salt to Taste
  5. Honey - 1 Tsp
  6. SALAD of your choice
  7. Cheddar Cheese - 1 Tbsp (Optional)
  8. Ground Pepper - As needed(Optional)
STEPS:
  • Have salad cut in the plate first
  • Marinate chopped Potato slices with Paprika,Mustard Sauce,Salt and Honey
  • heat the Pan on medium flame and sauté the marinated Potatoes.
  • Keep Sautéing and when you feel that marination is cooked,increase the flame to get the Potatoes little caramelized.
  • Spread the Potatoes on Salad in plate and sprinkle the Cheese and Pepper

Saturday, January 17, 2015

Vrat ki Aloo Jeera Sabji |Upaasachi Jeera Batatyachi Bhaaji |उपासाची जीरं बटाट्याची भाजी |Cumin and Potato Sabji for Fast

There are so many occasions we observe fast.Making heavy food is not a good idea but we end up with them without any choice left.We end up consuming double the calories of what we consume on a regular day.Day is ended with guilt in mind instead of contentment and happiness.

That is why I tend to try making healthy,easy and quick recipes that make me happy.It makes me happier when I share with you all.Let us start :D

Time : 10 Minutes (Boiling time for Potatoes excluded)
Serving : 2 People

INGREDIENTS :
  1. 8 to 10 Baby Potatoes or 2 big size Potatoes (I have used baby Potatoes).Make chunks as you like.
  2. Ghee or Clarified Butter - 1 Tbsp
  3. Green chilli - 2,chopped
  4. Cumin Seeds or Jeera - 1 Tbsp
  5. Lime Juice - 2 Tbsp
  6. Sugar - 1 Tbsp (Optional)
  7. Dates - 3 to 4 ,chopped
  8. Salt or Sendha Salt for Taste
  9. Dry or Fresh coconut,grated - 1/4 Tbsp
  10. Coriander or Cilantro - 1/4 cup (Chopped)
  • In a shallow pan,add Ghee and let it heat on medium flame
  • Now add Jeera or Cumin seeds and let them fry properly.We do not want raw smell and texture but nice crunch.
  • After Jeera is fried well add Chilli and Salt.
  • Now, add boiled Popatoes,Sugar and Lime juice and start sauteing.Sauté until Potatoes start developing golden brown color and become crisp.
  • Add grated coconut and Dates.Mix well and put the flame off
  • Garnish with Cilantro while serving.
TIPS :
  •  Validity of ingredients for fast changes from person to person.You can add or take out the ingredients accordingly.
  • You can sprinkle grated coconut along with Cilantro as well.
  • Make sure Jeera or Cumin seeds are not uncooked.That really spoils everything.


Sunday, December 8, 2013

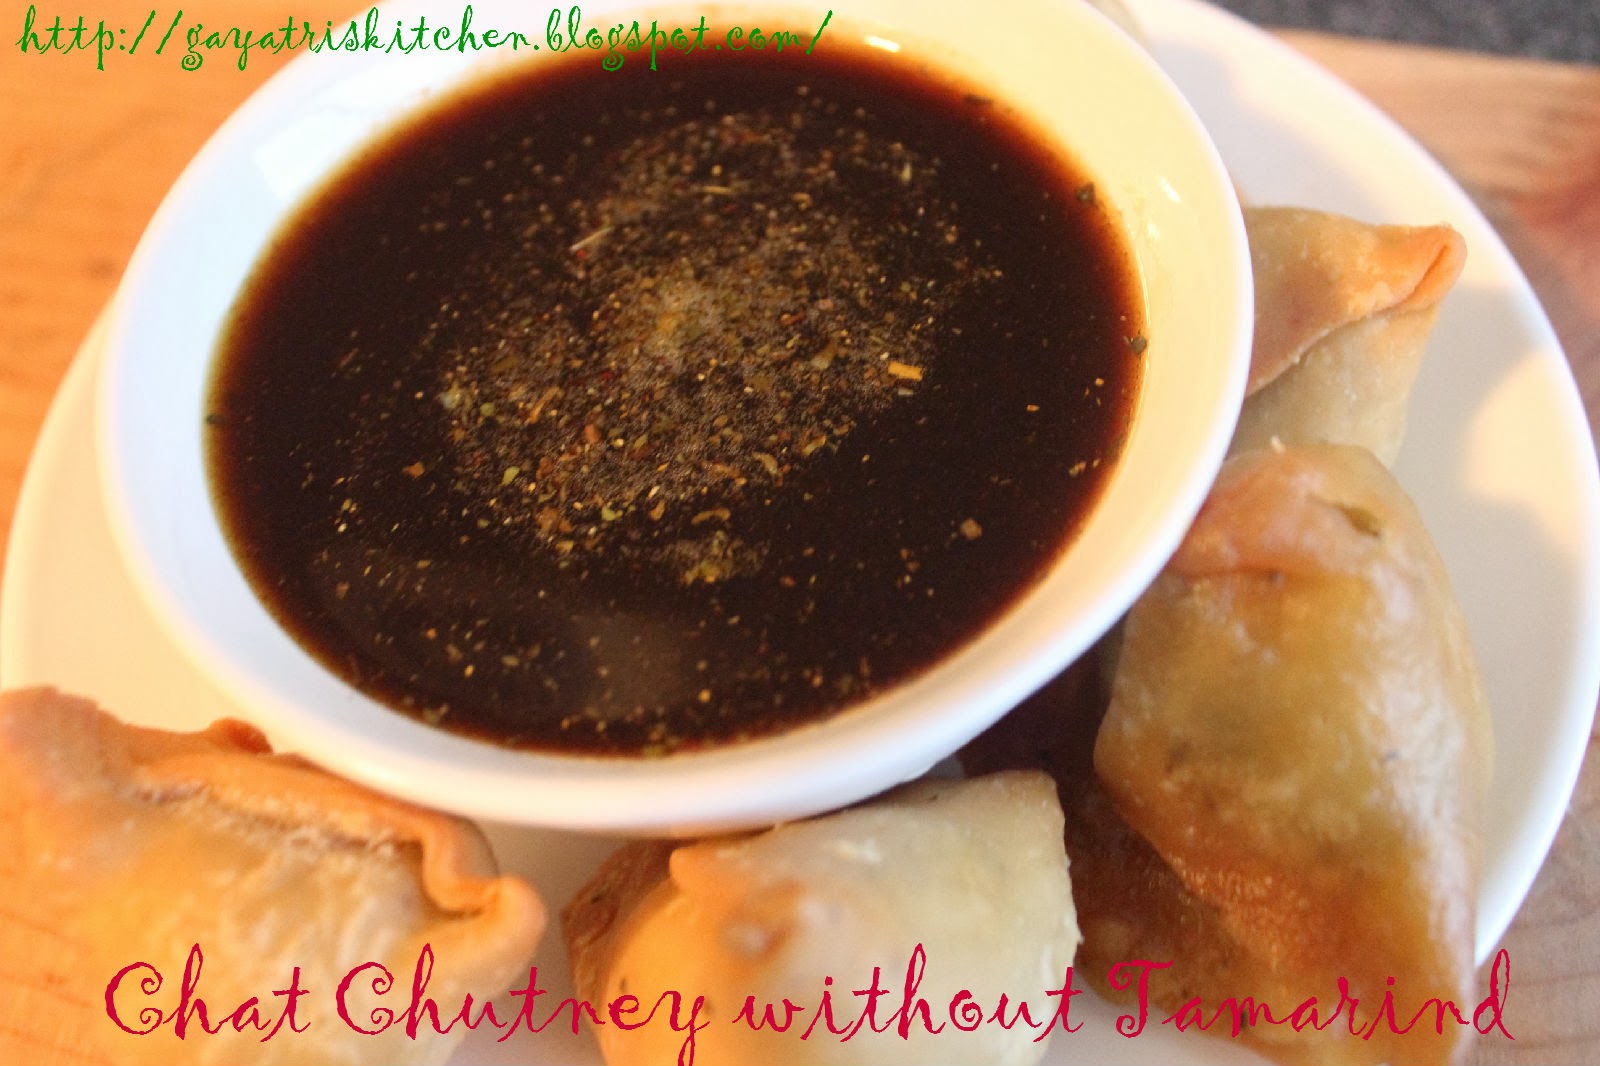
Chat Chutney without Tamarind

Surprised???? But it is true.I thank my friend Kriti, from whom I learnt this non acidic cutney.Usually this chat chutney consists of Tamarind.We all know that Tamarind is acidic.It definitely leads to acidity if eaten with empty stomach.I did this mistake once.I and my family was in search of Indian Restaurant.Finally we found one.I was very hungry and attacked Samosa and this chat chutney which was being served as starters.And needless to say,I spoiled my whole day with unbearable headache out of acidity.

But thankfully,I found this nice recipe to make chat chuteny.Now you too can as many chat items as you wish as starters without having tension of such silly incidents.It tastes as goods as traditional tamarind chutney.

Believe me,it is really a great item and very easy to make.


Ingredients :

  1. Jaggery - 1 Cup
  2. Sugar - 1 Cup
  3. Amchur or Dry mango Powder - 1/2 cup
  4. Water - 4 Cups
  5. Cumin and Coriander powder(Roasted) - 1 Tea spoon each.
  6. Salt to taste
Steps :

  • In the, water add Sugar and keep to heat up on medium flame.
  • As soons as you the Sugar is melted,add  Amchur powder and salt and let the mixture boil at low to medium flame.
  • If needed, add more water and let Amchur boil well.
  • Add Jaggery and let it melt.
  • Add Cumin and Coriander powder.
  • Put the flame off.
  • The chutney is ready to be served with Samosa,Kachori or any chat
TIPS:
  • Even if the chutney is very watery,do not worry.As it cools down, it gets thickened.
  • If you feel that it is still watery even after cooled down.Boil it for some more time and let it cool down again. 
  • Add Jaggery at the later part to avoid as Jaggery gets  burnt quickly.

Wednesday, November 6, 2013

Dahi Vada/Dahi Bhalla

I do not think there should be anyone who dislikes this dish.This is so delicious and mouth watering dish and one gets really contented after eating this.This chat dish is wholeheartedly lovded by everybody in India :)


This Serves 4 People.

 Ingredients : 

  1. Medu vadas - 8 in number.
  2. Curd/Yogurt - 500 grams
  3. Ginger paste/crushed - 1 table spoon
  4. Cumin seeds  - 1 Table spoon
  5. Salt to Taste 
  6. Sugar  - 1 Cup
  7. Coriander leaves
  8. Cumin powder - 1 table spoon
  9. Coriander powder - 1 table spoon
  10. For garninshing - Chat masala,Red Chilly powder,Sev or Bhujia,

Steps:

  • First let us see how to make butter milk in which these vadas are to be soaked.In container take around 200 grams of Yogurt.Whip it and add water according to the consistency you want for butter milk.To that add salt, Sugar such that you feel more sweet rather than salty,Ginger Paste,Cumin Podwer,Coriander powder,Cumin seed and Coriander leaves.Mix it well.
  • To that add the vadas to soak and keep in refrigerator for around 3 hours.
  • In remaing 300 grams of Yogurt,add salt, a cup of sugar and whip it.Add water such that yogurt get texture of a thick batter.It should be neither very thick nor very watery.Keep adding water until you get required consistancy.This yogurt should be sweet in taste.Keep in refrigerate.
  • While serving, In a bowl, keep soaked vadas.On that pour the creamy yogurt.Garnish with Sev,Tamarind Chutney,Chat masala and Red chilly powder as shown in picture.

 TIPS :

  • If you are not in favor of sweet, you can reduce quantity of sugar in yogurt.